YouTube Video
YouTube Video Transcript
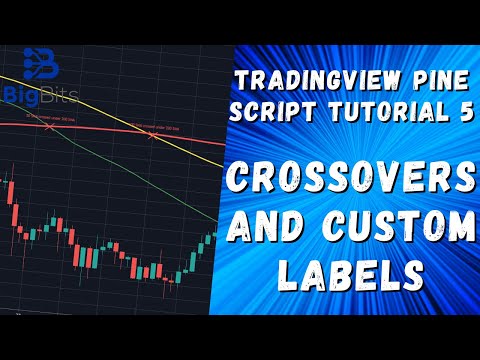
[Music] hey this is David for big bits in this video we’re gonna continue our series on the trading view development with pond script for creating our own indicators and much more so in the last video we continued our efforts on our triple moving average script that we’ve been working on and we’ve gotten a lot done on it and now we’re going to move on to adding labels onto our indicator and the labels we’re gonna add our four crossovers and it’s gonna give us quite a bit of information on what the crossovers are for here you can see the label shows the 50’s ma crossed over the 100’s ma so we’re gonna be able to get a lot of information just by looking at the chart with the labels and we don’t have to really guess where the crossovers occurred we’re gonna know exactly where they occurred because there’s a huge X right here with all the information that we need so one of the other things I did want to cover before we go into this video I think I mentioned the last field we’re gonna talk about functions that’s actually not in this video it’s in the next one with forecasting where we really clean up a lot of the code as well so if you’re here for the functions and forecasting that’s in the next video but let’s go ahead and get started talking about this indicator so it’s pretty much the same one you seen in the last one except we’ve added some more options let’s go ahead and look at the inputs so you can see kind of what we’ve added here now you can see also there is a checkbox to show whether or not the particular moving average should be visible or not and you’ll notice when you look at the crossovers here if it’s involved in a crossover it’s gonna hide the crossover it’s pretty neat if you aren’t thinking about it and you aren’t well prepared in your code then there’s a good chance the way the pond script works if you don’t think out not showing the labels you could easily forget to do that so that’s just something to keep in mind if you do your own indicators is if you are going to be hiding and showing these things make sure you consider that you should also hide any labels associated with those as well if that’s what you want now if you still want them to show up say if you wanted to hide this line and you still wanted to see where the crossovers would occur you’re perfectly welcome to do that but for our process our purposes we’re not going to do that but the other option is say we want to see all three lines but we don’t want these crossovers getting in the way you know maybe we just want to look at a nice clean chart or maybe they’re hard to read so we can just uncheck this one and we can hide our crossovers I’m going to show you how to do all of this in the code in just a moment let’s turn those back on okay perfect now we can really begin on the code here now you’ll notice I have added a couple more options on the moving averages we’ve added the double and triple exponential moving average which we’ll show you in just a moment and we’ve also of course added those inputs for whether or not the moving average will be visible and we also added the input for whether or not we should show the crosses on the chart now you’ll notice all of these new inputs are boolean or bulls okay the default value is true which means they’re going to be checked if you’re not a developer a boolean is just a check box if you’re working with like Excel or something it’s either a yes or no and it’s just really one or the other you know it’s either on or off it’s like a light switch okay so going back in to our logical statements here with the moving averages you’ll see the double exponential moving average and the triple exponential moving average and if you’ve watched the last few videos you’ll know that whatever the last line is in the if statement is the value that’s going to be assigned to the original if statement so the MA one even though there’s two lines of code here will only be assigned the value from this line of code so I know I’ve discussed this before but we didn’t actually have two lines of code to show you that example let’s go ahead and actually change it to double exponential moving average just to show you there we go so the double exponential moving average you can see that it assigned it the value that was here and we’re charting our double exponential moving average now okay simple enough let’s continue on skip past all of the other moving average code all right so this is where we really have a lot of information to cover quite a lot actually so what we’re doing is on the chart we’re showing our labels the labels are there to show specific information I think I actually have this up already the URL here that I’ve added in the comments I have that open here and you can see information about the labels and you kind of get an idea of what they’re for and all of the different options and parameters that you can use to set with those now you can set specifically where on the chart to set them so that’s important to keep in mind for later on and you’ll understand why in this particular video I think we’re only going to be working with being Y location we’re only really worried about where it is on the current bar we’re not worried with the x-axis which would be a different bar in the future in the past when you’re looking at a chart but one thing we do need to keep in mind for sure is the color the style the text color and the size these all have something to do with how they are displayed on the chart so let’s look at the style see where is that oh it’s label dot style let’s look at set style it doesn’t give you that information here so let’s just go back to our labels and I was actually just show you on the chart some of the different ones so for example we are using the X cross but if we wanted to change the style we could so let’s say this is the 50 over the 100 that would be the 1 over the 2 excellent okay that’s this one let’s change the style to arrow up you’ll see this one should become an arrow that points up to should take in a moment you oh no that’s the cross under I was looking at the wrong one I just sit there waiting for it to update I was starting to panic that it didn’t work but yet I actually did the wrong one so that should have been an arrow down it’ll make a little bit more sense if it’s a narrow down takes a second to compile these okay there we go you can see the arrow down but our location is set on the crossover so let’s change that back to a cross and you can actually see the differences in the different settings here so we have our color which is the shape the colors for the shape the text color obviously for your text that’s set to red our style is set to a cross and our size is set to small there is an auto size but it looked like way too small here so I had to set it manually and you can play around with that as much as you need to so let’s go back into actually determining whether or not we should put one of these labels on the chart so we have to determine when these crossovers occur obviously we don’t want to show a crossover when there isn’t a crossover so the first thing we need to do is we need to put a logical statement on here now this is great because we can actually use logic to determine whether or not we need to place something on the chart now we stored a variable on the input for showing the crosses so we’re going to check and make sure all these conditions are true before we actually place these on the chart so show crosses is the one that’s you know every cross over has to have this be true because it controls all of them remember that’s make sure you can see that perfectly good show crosses is this option and we want to have this enable and disable all of them so if you have it checked it needs to be true or yes on all of the crossovers that we’re doing now you can see there is also ma one visible so we also have to have not only show crosses but we also have to have ma one visible true or set to yes as well check okay since we are working with a cross over we need the second line set as well so is the MA two visible yes it is and there’s more to it we need to make sure it actually crossed over so there is a built-in function for cross under and we want to check if the MA one here crossed under the MA – and now if all of these are true then we can create our label and apply it to the chart now let me take a look and see I forgot to add this into the comments maybe I’ll do that now and that is a link to this particular built-in function and you can see this is just part of the trading view pine script built-in function you can see whether something crossed under or crossed above another set of data so that’s important to use for this one obviously since we’re doing crossovers it might be good for other indicators that you’re doing as well for other things maybe you only want to displace something or maybe you want to change the color of something when there’s a crossover you don’t necessarily want to have a new label maybe when the Green Line crosses above here maybe it turns a bright green and when it goes below maybe then it’s another color that these are just options or maybe you fill in the colors between these I’m not entirely sure you can change the color of the line from segment to segment maybe you can but what’s really important is that you know that you can do conditional changes here and playing around with that kind of stuff might be helpful to make your indicator look better now now that we know that all these conditions are true and we have cross under in this particular instance we create our label and I’ve already went over all this but for the text that we’re going to use we can actually use something called two string this is another built-in function probably need to add this one as well and it’s just gonna take some sort of value that you have that isn’t already a string and it’s gonna convert it into text if you’re a developer we use the word string but it’s just text that’s a simple way to think about it so when you do a to string it converts your period your MA one period to text so you can see the 50 period all right just the number 50 and then we concatenate the string which means we add other text to it we add a space and then we add in the type the type was already a string so we didn’t have to call that function to string see 50 space SMA and that’s the type we had selected and then of course we know that this is happening because it crossed under because that’s the function we used and then we just do the same thing for the second SMA and you have this wonderful text that tells you exactly what’s going on on this cross over and this might be useful to tell you other information okay so one thing that you’ll notice is when you do this the first time the label might get plotted at the wrong location so it might be plotted on the clothes instead of on the actual indicator where you want it so to make sure you get it where you need it on the chart you need to make sure you specify where on the y-axis you want it if the default value that it gives you isn’t okay now for me I think the default value was the clothes so it would have showed the cross over down here but that doesn’t make any sense the cross over actually occurred up here so we had to do was once we created the label now we had to assign it to a variable so that we could access its built-in functions later we would call label not set Y and we would tell it what label we want to change the Y access for and it would set it at the MA value now you can calculate the average or the distance between the lines but it’s not really necessary as long as you have a general idea on the chart now if you need to be super specific you can specify a specific number don’t think that you came it’s just it’s not really necessary for this particular indicator so I didn’t do it now for that we go through all of the different options for cross overs and cross unders for all of the indicator or all of the moving averages that we’ve added now if you wanted to add yet another moving average and be an MA for then you would need to make sure you consider all of the scenarios for that and apply that in this section as well so maybe we’ll get to that eventually we’re not going to do that now and then of course we still need to plot our moving averages now you’ll notice when we did our logical conditioning or our logical conditions here you’ll notice we check to make sure that the moving average was visible now when we go to plot the moving average we also want to do a conditional check to make sure that the moving average is visible all right and this is pretty much an if-statement so it’s gonna check what came before it and make sure that this or the set of conditions and you can use a set of conditions not just one are true and if it is true question mark this is what it’s going to use this is the value that it’s going to use however if it’s not true then this is the value that’s going to use which is not applicable and it’s not gonna draw it and we can show you that just by simply turning off the different lines making them unchecked for visible status now hopefully I know there was a lot this video but there really was a lot to cover in this one compared to the other ones hopefully you’ve gained a lot and we are going to move into functions but I’m really excited for the next video because it is about forecasting values at the end of the moving average so if the moving average for the 200 here was to stop at this dot it would show us where it expected the moving average to be if the price were to stay flat but I also have a couple of other things that I haven’t seen on any other scripts so far and now don’t get me wrong I haven’t went through every single script but this is something I just kind of thought of when I did it I’ve also done something for the forecasting too where we can apply a bullish or a bearish forecast now when you forecast out a lot of the ones I’ve seen have just either went with the fact that the price is going to stay neutral or it’s going to continue going down at the slope that it was before now to me that doesn’t really seem super helpful to not have different options to see where it would be because if you’re forecasting a moving average in the future what you’re really trying to do is see how the impact of losing the previous candles will impact it based on different scenarios now neutral is great because it lets you see where it would go just without any new information okay now the bullish and bearish ones you’re gonna like these because it’s going to allow you to say whether you want your forecast bias to be bullish bearish or neutral and then if you choose bullish it will take the average true range of the last 14 candles and it will use that to increment the price on the forecasted so say for example we forecasted the price to go up in a bullish manner we would get the average true range 14 candles back and it would plot the forecast for this 200 moving average as if it would move up by that amount every single candle till the end of the forecast whereas if it was neutral it would go sideways and if it was bearish it would go down now there is another thing that I really like about it is that you can do a magnitude so if you think that the average true range was too high or too low it’s going to multiply that average true range by the magnitude and you can actually tell it if it should go very bullish like nearly even straight up or nearly even straight down for a bearish example and you can get a very wide array of examples of what the forecast could be which is really neat I’m excited about that one now if you like this indicator that we’ve done and you like the idea of the forecasting indicator please check out my trading view profile I have all kinds of scripts on there already including the one that we’re going to be doing next which is the forecasting one I have another one that I’m working on past this which is going to allow you to select different resolutions or different time frames for the different lines so there’s a lot to look forward to in the videos if you liked this video please hit like if you like learning about trading and trading view indicators and strategies please subscribe I’ve also been doing some live streams so please check out the channel subscribe and just keep coming back I appreciate you viewing and hopefully I’ll see you again soon thanks [Music]
YouTube Video Description
< br/> ???? IMPORTANT LINKS BELOW ????
TradingView Pine Script Tutorial: In this video, we discuss the ability to detect and label crossovers in TradingView. Similar to TradingView Crossovers, you can also detect crossunders, which is also highlighted in this video. The labels are given custom text to provide you with more useful information. With Pine, it is very easy for even beginners to create their own indicators that have many other indicators within them. Once we have completed the script, we can see our results immediately and begin working with more functions and indicators before eventually moving on to creating our own strategies.
??♂️??♂️??♂️??♂️??♂️??♂️??♂️??♂️??♂️??♂️
Social and other public profiles
??♂️??♂️??♂️??♂️??♂️??♂️??♂️??♂️??♂️??♂️
? Website: https://bigbits.io
? Discord: https://discord.gg/rapMn4z
? Twitter: https://twitter.com/BigBitsIO
? Facebook: https://www.facebook.com/BigBitsIO/
??GitHub: https://github.com/BigBitsIO
?TradingView: https://www.tradingview.com/u/BigBitsIO
???????????
Referral links
???????????
? Buy, Sell and Trade Crypto on Binance.US with LOW fees: https://www.binance.us/?ref=35105151
?♂️ Want to buy crypto? Get $10 of bitcoin w/ your first purchase over $100: https://www.coinbase.com/join/johnso_dxz
? Sign up for a paid plan at TradingView and receive a $30 credit: https://www.tradingview.com/gopro/?share_your_love=BigBitsIO
? Browse privately and get rewarded with Brave Browser: https://brave.com/big406
? Receive bonus perks when purchasing Lightnite Game: https://lightnite.io/ref=BigBits
VIEW ALL HERE: https://bigbits.io/bigbits-referrals/
❗️❗️❗️❗️❗️❗️❗️❗️❗️❗️❗️❗️❗️❗️❗️❗️❗️❗️❗️❗️❗️❗️❗️❗️❗️❗️❗️❗️❗️❗️❗️❗️❗️
DISCLAIMER: All my videos are for educational and entertainment purposes only. Nothing in this or any of my videos should be interpreted as financial advice or a recommendation to buy or sell any sort of security or investment including all types of crypto coins and tokens. Consult with a professional financial advisor before making any financial decisions. Investing in general and particularly with crypto trading especially is risky and has the potential for one to lose most or all of the initial investment. In simple terms, you are responsible for your actions when trading.
❗️❗️❗️❗️❗️❗️❗️❗️❗️❗️❗️❗️❗️❗️❗️❗️❗️❗️❗️❗️❗️❗️❗️❗️❗️❗️❗️❗️❗️❗️❗️❗️❗️
#bitcoin #crypto #cryptocurrencies #tradingview #binance #binanceUS #coinbase
This channel focuses on Bitcoin, Ethereum, LiteCoin, Ripple, Link, Basic Attention Token and almost all cryptocurrencies that demand attention. Please like the video if you liked the video, and subscribe if you like these types of videos. David from BigBits is an experienced Software Engineer, but no one is perfect, If you find any issues with any of the open-source, free code, or code shown in videos please comment to let us know what to fix, we listen to our viewers!